Friday, December 28, 2007

Front Forks

Lots of work happening on the beast while I've got some time off of work for the holidays.

The latest job to be finished was the forks. The chrome tubes were pitted with rust when I got the bike, and the rubber in the seals was old and hard, both consequences of the coastal location of it's slumber. A re-seal was definitely in the cards.

The old forks came apart pretty quick. Despite their pitted tubes and cracked dust seals, they actually held some air pressure from 27 years ago. Amazing. The oil was nasty with condensation and metal particles though.

I tried polishing the rusty fork tubes with 800 grit wet sandpaper, fine steel wool and chrome polish, but the left tube was too far gone. The right tube would work in a pinch - it had only one tiny pit that I filled with a drop of epoxy and sanded flat. I debated using epoxy to fill the numerous pits on the right tube, but I rejected the idea as too half-assed for me. I really like to do things the right way. So, despite the hit it would make to my budget, I sourced a replacement used tube on eBay. I ended up buying an entire fork set that had one good tube.

I bought some OEM fork seals and dust shields too. Not too expensive - less than $40 for the lot. And, since I can't resist improving things when I rebuild them, I also found a set of new Progressive fork springs to match the uprated rear shocks I've installed. I used 15w fork oil to replace the nasty stock stuff (in place of the recommended 10w20 engine oil) and give a little better damping.

The eBay forks come with an aftermarket fork brace (1980s Pro Circuit - I thought they only made dirt stuff?) which should do even more for the front end. The forks also had an air tube crossover kit, which needs a new fitting to work.

While the forks were off I disassembled the steerer tube and steering bearings. The tapered bearings on this bike are definitely over built, and 12,000 miles is nothing for them. New Bel-ray waterproof grease went back in, and I carefully adjusted them to eliminate any slop or unnecessary friction.

After thoroughly cleaning all the internal parts, I assembled the suspension on the bike and added fork oil to the stock level - 140mm from the top. I pumped it a few times and all was good. I then installed the front wheel and brake calipers and bled the brakes. A nice, hard lever was the result.

With it's improved suspension, new sticky tires, braided brake lines and modern brake pad compounds the GS1000 should handle and stop about as well as possible for a 30 year old beast of a bike. I might not be able to hang on the tail of the guys with modern 600s, but I'll sure be able to keep them guessing.

All that's left is cosmetics, and of course starting the engine for the first time in 27 years. I can't wait to get it back on the road!

Saturday, December 22, 2007

Tank Cleaning and Petcock

The tank was rusty inside when I got the bike, a pretty common problem when a motorcycle's been sitting around for as long as this one had been. It wasn't rusted through or anything, which is good, and the pits didn't look too deep.

The fuel gauge appeared to work when I first turned it on, but the petcock leaked badly. With the tank on the bench and drained of old nasty fuel, I removed the petcock for cleaning. Then I pulled the fuel gauge to make cleaning the inside of the tank easier.

The biggest problem with a rusty tank is the little rust particles that get knocked loose and get into the carburetor. There's a couple of ways to deal with the problem, including some involving expensive liner kits that tend to be finicky and sometimes cause more problems than they solve. The tank has a dent, which is another problem for a liner kit - removing a dent will usually chip the brittle liner and cause it to flake off. Since I'm not planning on having it painted right away I decided to just clean out the rust as best I could and add a fuel filter after the petcock.

First I rinsed the tank with solvent, in order to get rid of any old fuel deposits inside. This loosened quite a bit of rusty flakes, but there were plenty more inside. To remove them and clean the rusty surface of the tank, I filled it with a gallon of phosphoric acid. You can get it at Home Depot, and while it is nasty stuff it's not as bad as it sounds. Really - it's used as a preservative in cola, among other things.

I taped up the petcock and fuel gauge holes with duct tape and rotated the tank slowly, over about 24 hours. Phosphoric acid eats rust but attacks the good metal only slowly. At the end of the 24 hours, I drained off the phosphoric acid and returned it to the container. It should be good for a few more uses, at least. I then rinsed the tank with the hose outside.

To get rid of the water and prevent flash rusting, I threw in a quart of denatured alcohol. Alcohol is hygroscopic (will mix with any remaining water) if I remember my high school chemistry lessons well enough. After swishing the alcohol around for a bit, I drained it off too.

Finally, I mixed a couple of teaspooonfuls of motor oil with a couple of ounces of solvent. I dumped this mixture into the tank and swished it around to give the inside of the tank an oily coating that would keep out moisture and prevent rusting until I can get some gas in it.

The petcock ("Fuel Cock" in Suzuki speak) leaked when I first tried to start the bike, so I pulled it apart for inspection. The main inside seal was rotted and the outer lip seal was no better. The molded o-ring between the petcock and tank was intact but hard as a rock. The metal parts of the petcock were fine, so I ordered new rubber to rebuild it. Like all the other OEM parts I've bought, they were fairly inexpensive - under $10 for all three.

With the petcock and fuel gauge sender back in the tank, it was ready to go back on the bike with some new fuel line and a fuel filter. I reinstalled the seat, too. Suddenly the GS is starting to look like a bike again, but without the forks, of course...

Thursday, December 20, 2007

Front Brakes

The front brake system of the bike was not bad at all. It was full of old, nasty fluid, but no leakage and the pads had some life left. However, the rubber seals are nearly 30 years old, so for the sake of safety I wanted to replace them. The rubber hoses were cracked, and since the bike is fitted with shorter bars, were too long as well.

The master cylinder had a little grime inside, but no pitting. I bought a genuine Suzuki kit for it, and the quality and completeness of the parts was not lacking. A bit of scotchbrite and everything was as good as new. The master cylinder paint is suffering a bit, but not enough to warrant repainting. Possibly later...

The calipers were in good condition too. The pistons were a little tough to remove, but I did the channelock trick again (shhhhh!) and they came out with only a little drama. Each caliper took about 15 minutes to rebuild with all new seals and some new EBC brake pads. They're a nice, lightweight design for a '70s bike. Worlds better than the junk calipers found on some Hondas from the period.

Like with the rear brakes, I went to Earl's for new braided hoses. The stock system has three lines - the first one runs from the master cylinder to a tee on the lower triple clamp. Two more lines run from the tee down to the calipers on each side of the front fork. For simplicity's sake, I replaced them with two lines directly from the master cylinder to each caliper. The smaller braided lines fit easily within the stock hose brackets and work well. The little rubber boot doesn't fit over the long banjo bolt at the master, but it's not a necessary part anyway.

I installed the master cylinder and hoses, but not the calipers since the forks are not ready. I finally found some nice fork tubes on ebay - when they get here I can rebuild the forks and install the calipers and wheel.
In the meantime I'll keep working on the fuel system, cosmetics and a few other parts

Monday, December 17, 2007

Ignition system

As I mentioned in the engine evaluation post, the ignition produced a pretty weak spark. I set out to diagnose, and hopefully cure, the problem.

I pulled off the points cover from the end of the crank and took a look at the points. They were a little dirty and pitted, but not bad at all. The condensers didn't have any leaking electrolyte, so they probably were fine.

I checked the power supply to each of the ignition coils - both were around 12.5 volts, which suggests that the wiring and ignition switch is OK. I sprayed some contact cleaner in the bullet connectors and gave them a scrub with a scotchbrite pad for insurance before reconnecting them.

I disconnected the points from each coil and checked the potential voltage at the ground side - this would give a good comparison of coil resistance and the condition of the connections on that side of the coil. They were fairly equal at around 12 volts, so the coils were apparently in solid condition.

I cleaned all the connectors in the system and figured the next step would be cleaning and setting the points. Hopefully that would let it produce a nice hot spark.

I disconnected each set of points and gave them a quick brush with some 320-grit sandpaper. Then I checked the gap (.040, within spec) and gave them a blast of brake cleaner to get rid of any residual oil and dirt.

The result? A good hot spark. Maybe not as good as a modern bike or car, but certainly good enough to get this beast running again.

While I had the system apart, I also bought some new B8ES plugs from my local bike shop, and gave the ignition cover a good polish on the bench. I'll have to do something about the other engine covers eventually, but at least this one looks good!

With the new plugs in and the ignition system squared away, I sprayed some carb cleaner down the throats of my newly-rebuilt carbs and cranked it over. I was rewarded with a few second of (loud) idle through the naked exhaust ports. This thing is just about ready to run.

Monday, December 10, 2007

Carburetor Rebuilding

I couldn't reach an agreeable deal with the original owner of the bike for his set of VM29 smoothbores, so I decided to rebuild the stockers.

First I pulled off the float bowls to get an idea of the condition. Actually pretty good, so this should be easy.

I stripped the carbs down, removing the factory paint that sealed off the idle and mixture screws. I noted the number of turns for each one so that it would be easy to install them in the same place.

The carbs and rack came apart rather easy - no nasty gummed up fuel or overly bad corrosion was obvious.

I rebuilt each carb in turn - first I soaked the body, cap and float bowl in carb cleaner for 20 minutes, then gave them a quick wash with water. Finally I cleaned the hardware with solvent and gave all the parts a good looking over.

To reassemble, I added new orings to the drain, needle jet, idle screw, mixture screw and choke plunger. I had to get new gaskets for the float bowl and slide cover, since the originals tore when I disassembled them. The float valves were in good shape and didn't need to be replaced. Same for the needle and jet - all four sets were in great, lightly used condition. This bike would have been a perfect runner before it's 25-year slumber.

The stock carbs have a funny molded fuel feed tee, which has a tendency to leak. I used my favorite gasket sealer - Hylomar from the UK - to seal them. Hylomar is allegedly resistant to fuel, but I only used a tiny smear just in case.

The carbs went back in after a struggle - now I've still got to clean out the tank and rebuild the petcock, but the fuel system is getting closer to completion by the minute.

Monday, December 3, 2007

Rear wheel; shocks

The rear shocks on my GS were rusty and ugly, and they probably weren't very good even when they were new. So instead of wasting my time cleaning up 30-year-old springs, I figured I'd just buy some inexpensive performance shocks.

The MDI units found on ebay are well-known as decent shocks, especially for the money. They tend to be sprung a little hard but that shouldn't be a problem for this 500-pound beast of a bike.

On the GS Resources I found some second-hand but unused shocks for $55 shipped, about $20 off the usual shipped price on ebay. The shiny chrome springs will definitely spruce up the rear of the bike.

The rear end of the bike is now finished - the swingarm pivot bearings and rear wheel bearings were tight as a drum and didn't require any service. The rear wheel is squeaky clean and polished (after a good day's work with steel wool and alloy wheel cleaner) and is sporting a brand new Bridgestone Spitfire tire in the stock size. The swingarm itself is straight and now clean and the chain looks as if it has minimal wear (it's definitely been replaced at some point). the brakes are rebuilt and I installed some new shocks.

Tuesday, November 27, 2007

Rear Brakes

The rear brake system was completely rotted out on the bike when I got it - the master cylinder had leaked out all of the brake fluid, the caliper was seized and the pads were worn almost to the backing plate. in addition, the rear brake line was suspect simply because of its age. (The shop manual recommends replacement every 2 years!)

I removed the entire system and stripped it down for a rebuild. The master cylinder looked OK, there was some tiny pitting on the inside of the bore, but a little scotchbrite cleaned it right up. The piston and seals would be replaced with a rebuild kit, so it didn't matter what condition they were in.

One side of the rear caliper came apart easily, but the other piston was stuck in its bore. Normally I would use compressed air to blow it out of the caliper body, but since I don't have a compressor at home I used a pair of Channelocks. it's a brute-force way to do it, and can cause damage to the piston if you're not careful so I don't normally recommend it.

Both pistons had very minor pitting - not enough to reject them. With new seals this caliper should work nicely, with no leaks or sticking problems.

I ordered the parts to rebuild the system from Motostiles in Lawndale. They were very helpful, but I later learned that OEM parts from a mail-order Suzuki dealer would have been cheaper.

The rear brake hose is a $35 part from Suzuki, so i brought the original down to Earl's in Lawndale, near where I work, and had them make up a replacement in stainless braided teflon hose. I've gone this route on most projects I've done, and I'm always happy with the results. At $36, it was no more expensive than the overpriced original, and should last much longer.


I assembled the brake system onto the bike and did a little cleaning in preparation for installing the new rear tire and wheel.

Wednesday, November 21, 2007

Engine Evaluation

Just for kicks I tried to start the engine when I first got the bike home, but even then I didn't have much hope for it starting. Of course it didn't. I pulled the plugs and found there was only a very weak spark. The plugs were also very well corroded into the head; I used lots of PB Blaster to get them loose so I didn't strip out the threads.

Once I had the plugs out I pulled off the points cover to check their condition. I sprayed a little contact cleaner onto them and ran a business card through the gap. No improvement. What I did notice, however, was the spark that blew across each point gap as it opened. This indicated that the condensors are bad. I didn't bother checking for voltage at the coils, which would be the next step, since I had several other things to attend to.

In the meantime, I spoke to the original owner of the bike. He's a really cool old guy who would still be riding if he hadn't taken a bad fall in the early 1980s. Turns out he has a small stash of new parts for the bike - coils, filters, points plate and a set of 29mm Mikuni smoothbore carbs. I will probably be buying them from him in the next week, since it will save me time and money versus restoring the stock carbs and buying new points.

Back to the engine: I removed the stock carburetors, since there is no point trying to get it to run without giving them a thorough cleaning. Sitting around for 25 years with fuel in them is the worst possible thing that can happen, since the dried out fuel will leave all kinds of nasty deposits inside each one.

I also removed the intake manifolds to give them a thorough inspection - behind each one is an o-ring that hardens and breaks over the years. Vacuum leaks here will cause poor running that will be hard to diagnose later. Removing the stock screws was a bit of a challenge - I used an impact driver on the outer two screws, but the remaining ones did not allow enough space to swing a hammer. I used the bit from the impact drive alone - a good whack of the ball-peen loosened them right up.

An inspection revealed that of course two of the orings were broken. The other two were so hard they were not acting as gaskets any longer. The manifolds themselves appeared in decent condition. No cracks, and the rubber was still flexible. The bond between the rubber and steel flange was loose around the outside edge of a couple of them, but the inside of the flange was still tightly bonded. They should work fine.

With the plugs out and carbs off, I attached a compression tester to each cylinder in turn. I cranked the engine over until the gauge did not increase. Ideal compression for an old 4-cylinder like this is in the 180psi range. The dry old cylinders only managed between 60 and 90 psi. Not good, but hopefully it was caused by stuck rings. First round: 90-80-60-60. I filled each cylinder with automatic transmission fluid to clear out the rings, and let it soak in.

I'll check the compression again after a few days; hopefully the ATF will loosen up the rings and compression will shoot back up. If it does not increase I'll still leave it for a while - the rings may loosen up after the engine runs for a little while. Only after I've put a few 100 miles on the bike will I worry about low compression.

So now that the carbs and engine had been inspected, I made an assessment of the engine condition for future work:

Engine Issues
- Carbs crusty and dirty
- Manifold o-rings broken
- Manifold hardware corroded and damaged
- Low compression
- Minimal spark; arcing across points
- Case outer covers corroded and dull
- Starter cover rusty
- Cam covers rusty
- Missing air filter
- Oil old and unknown condition

Monday, November 19, 2007

Inspection

After I got the bike into the garage I immediately removed the tank (one bolt at the rear, fuel gauge wires, vac. and fuel lines) and seat (two hitch pins in the hinges). This made it easier to see every detail of the frame and engine for a full diagnosis.

I started at the front of the bike, cataloging every issue that would have to be dealt with before the project is finished, no matter how big or small. The list is not final yet, but here's a start:


Front End
- tire old and hard
- wheel lightly corroded
- fender heavily corroded
- fork tubes heavily corroded
- fork seals cracked
- brake lines cracked
- gauge backs lightly corroded
- switches, fork area dirty
- headlight rim heavily corroded
- top nut and misc. hardware corroded
- levers and hardware lightly corroded
- missing cushion over handlebar clamps

Tank, Seat, Airbox, Sidecovers, Wiring
- tank rusty inside
- petcock frozen in "ON" and leaky
- one dent in tank
- grab rail corroded
- rearstand handle corroded
- missing airbox and sidecover harware
- paint dull in general
- mis-matched sidecover
- all four turn signals in poor, corroded shape
- electrical panel lightly corroded; contacts corroded
- exhaust looks like crap - totally rusty

Frame/Rear Suspension
- minor scratches/chips in frame paint
- rear brake MC leaks
- rear wheel lightly corroded
- rear brake pedal lightly corroded
- some hardware corroded
- rear tire old and hard
- chain dry; unknown condition


Engine evaluation requires a bit more work, so I'll get to that next time.

Friday, November 16, 2007

Getting Home

So I finally got the bike into my garage and started working on it. With the help of a friendly relative with a truck (thanks Vic!) I got it loaded. The trip home was uneventful.

Once home I immediately gave the bike a thorough cleaning with simple green and a hose. I removed the air cleaner housing and side panels to make this easier.

A quick inspection showed it to be just as I had thought - good solid paint, but the chrome and alloy had been attacked by the salty air in Torrance. Some parts, like the brake and shift pedals, levers and wheels will be easy to clean and make look nice again. Others, like the engine side covers, will have to be professionally polished or replaced. The forks and front fender are probably too bad to salvage - I will likely either paint the front fender or replace it with a better one.

The side panel badges are mismatched, which I didn't notice before, but it should not be hard to find a pair on ebay.

I couldn't resist the urge to install a battery that I had laying around - it is slightly smaller than the stock battery but should have enough power to start the bike. I checked oil, threw in a few ounces of fresh gas and hit the thumb button. It cranked over (indicating that the engine is not seized), but didn't start. I opened a couple of the carb drain plugs and found that the engine was definitely getting fuel, or at least enough to cough. I pulled a plug and the reason for the non-starting was quickly apparent - a weak spark that could barely bridge the stock gap showed that something was wrong with the ignition system. I planned to rebuild the carbs and tank before getting serious about starting it, so I gave up and rolled it into the garage.

To Be Continued...

Wednesday, November 14, 2007

The Search and The Deal

I've been checking all the usual suspects the last couple of weeks - Craigslist, eBay, etc.

Finally I found an ad on Craigslist for two 1978 GS1000s in Torrance - the ad said they had been sitting since 1982. Seller wanted $400 each, which seemed fair.

When I went to check out the bikes they were pretty much as advertised. One was nearly 100% complete, the other was missing turn signals, grab rail and had an aftermarket seat. Apparently it was originally fitted with a Vetter fairing (also included). Both had rusty chrome and corroded alloy, but nothing looked too serious. The paint on both looked like they had been stored inside as claimed, but of course the tanks were rusty inside.

Ultimately I bought the better one of the pair - the second bike was just missing a few too many parts and the seller wasn't willing to deal. I may buy it later if we can work something out.

It's a 1978 GS1000 "E" model with cast alloy wheels and triple disc brakes. It differs from other pictures I've seen in not having the "skunk" white stripe, and having black lower fork legs. Odd, but apparently some came that way.

Here are some pictures that the seller took:

Tuesday, November 13, 2007

A little background

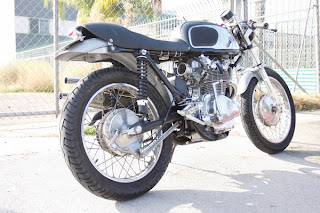
This whole thing came about because I am nearing the completion of a Honda CB450 vintage race replica project that I've been working on for the past year and a half. It's a fun little bike, but not serious, and somewhat small.


This is what it started out like:


In a nutshell, it's a 1971 CL450 with a "black bomber" chrome tank from an early model CB450. Rattle-can frame & tank (paint sux on it, though). Full list of mods:

- CB750f 35mm forks; cut springs, modified valving, fork brace, custom axle spacer
- CB500t triple clamps, polished & clamps removed
- Honda-repro levers & stock RH switch
- Dunstall-replica clip ons & Ceriani-replica headlight brackets; stock headlight & tach
- cleaned up wiring harness
- Airtech seat, custom upholstery
- 1967 CB450 tank; bad paint & mediocre chrome
- Cut & painted rear fender; 'glass front fender from ebay; lightweight alloy rear light & license bracket
- removed side covers, battery box, center stand and unneeded brackets (ctr. stand brackets remain)
- custom battery box for AGM battery
- GSXR rearsets; brackets polished, custom linkage, rear brake cable conversion
- NOS S&W rear shocks, 1" longer than stock
- Rebuilt engine; ported head, Cappellini race rollers, new valves, Kibblewhite guides, polished cases, CB550f kick starter, custom 73mm JE pistons; velocity stacks
- Soon to come: billet rear brake stay, better cable anchor, 2:1 exhaust

The GS1000 will be a natural progression of this project - I did so many mods to the CB450 that it isn't really the same bike any more. I want the GS1000 to be all stock, tempting as it may be to modify it.

Monday, November 12, 2007

Why GS1000?


Recently I thought it would be fun to find an old "big bike" to fix up and make look nice. Not really a 'restoration' per se, but more of a 'refresh'. I wanted to find something that was common enough to be easy to restore and inexpensive enough that I could afford to buy a fixer. Also something with style, and a little flash. Thousands of various so-called UJMs were made in the 70s and 80s, but 90% were ridden into the ground because they're so durable, especially out here in California.

I thought of SOHC CB750s, which are really popular right now, but they're just a little too lo-tech and common for me. The DOHC CB750 is a cool bike, too, but I don't see them for sale in fixable condition very often. Forget the Kawasaki Z900 and Z1000 - those are too in demand in Japan, where they're seen in somewhat the same nostalgic light as muscle cars are here in the states. Even a basket "zed" can run $1500 or more. Neat, but not really what I was looking for.

Of the remaining big bikes, Honda GL1000 Goldwings are cool, but most have terminal mileage and something about the shaft drive turns me off. Too old man, maybe. Skipping right over the forgettable (and ugly) Yamaha XS750 and 1100, the most likely candidate was the Suzuki GS750/1000.

So the search was on. My requirements:

- Cheap. I'm not a rich guy, and so it had to be inexpensive. I also know how expensive these projects can be, so it's important to start right and keep the budget low from the beginning. I assume the tires are going to be bad on an old bike, and probably the chain, tank, carbs, etc. About $400-500 before I can even start on the cosmetics. Also, I'm looking for a bike that only sells for $2500 in perfect condition, so there isn't much of a margin if I hope to come out ahead of just buying a good one.

- Complete. It's a serious PITA to track down parts for some of these bikes, so the more parts the better. Particularly trim (side panels, seat, etc.)

- Cosmetically pretty good, not perfect. I don't mind a little crust, dust and possibly rust. No massive dents. Original paint that could be salvaged would be nice, and good chrome too. Japanese chrome and polished alloy from the 1970s tends to go off pretty quick.